0

Your Cart is Empty

Pattern Hack: Make Kids Shorts using our Harem Pants Pattern

3 min read

PATTERN REQUIRED: Kids Harem Pants.

The following are instructions outline how to make shorts using the Kids Harem Pants pattern. These shorts will be fine for both girls and boys. They feature a full (covered) elastic waist & give you the option of adding pockets if you like.

If you don't already have this pattern, I recommend purchasing the Kids Tumble Bums instead as they feature shorts, knickerbockers, pants & harem pants & include 3 different waistbands. They do not, however, feature pockets.  

First up, if you haven't already got it, CLICK HERE for the pattern you need. The pattern is from sizes (age) 3-10.

To join our Facebook group for more tips and advice or just to share what you're making with a fabulous bunch of women who vary in experience from beginners to advanced, CLICK HERE.

 ___________

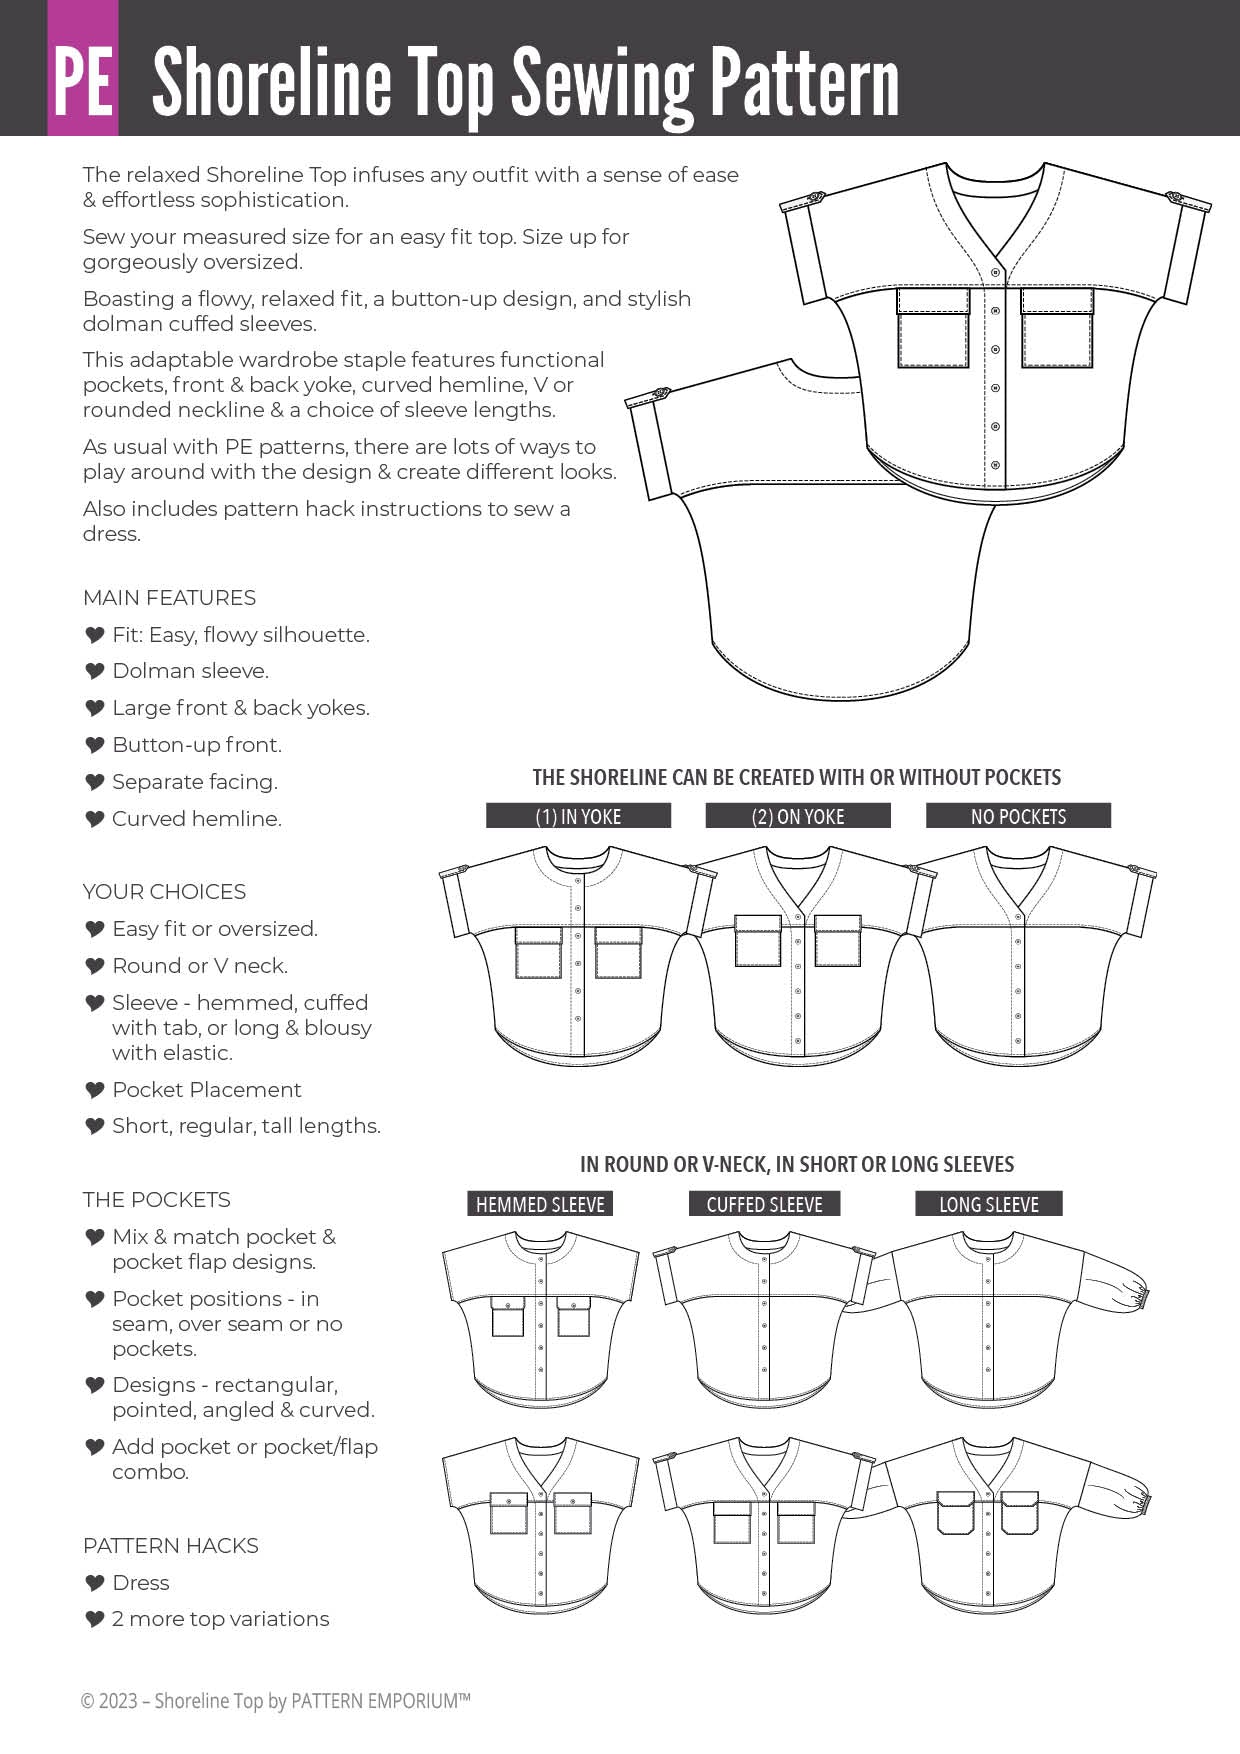
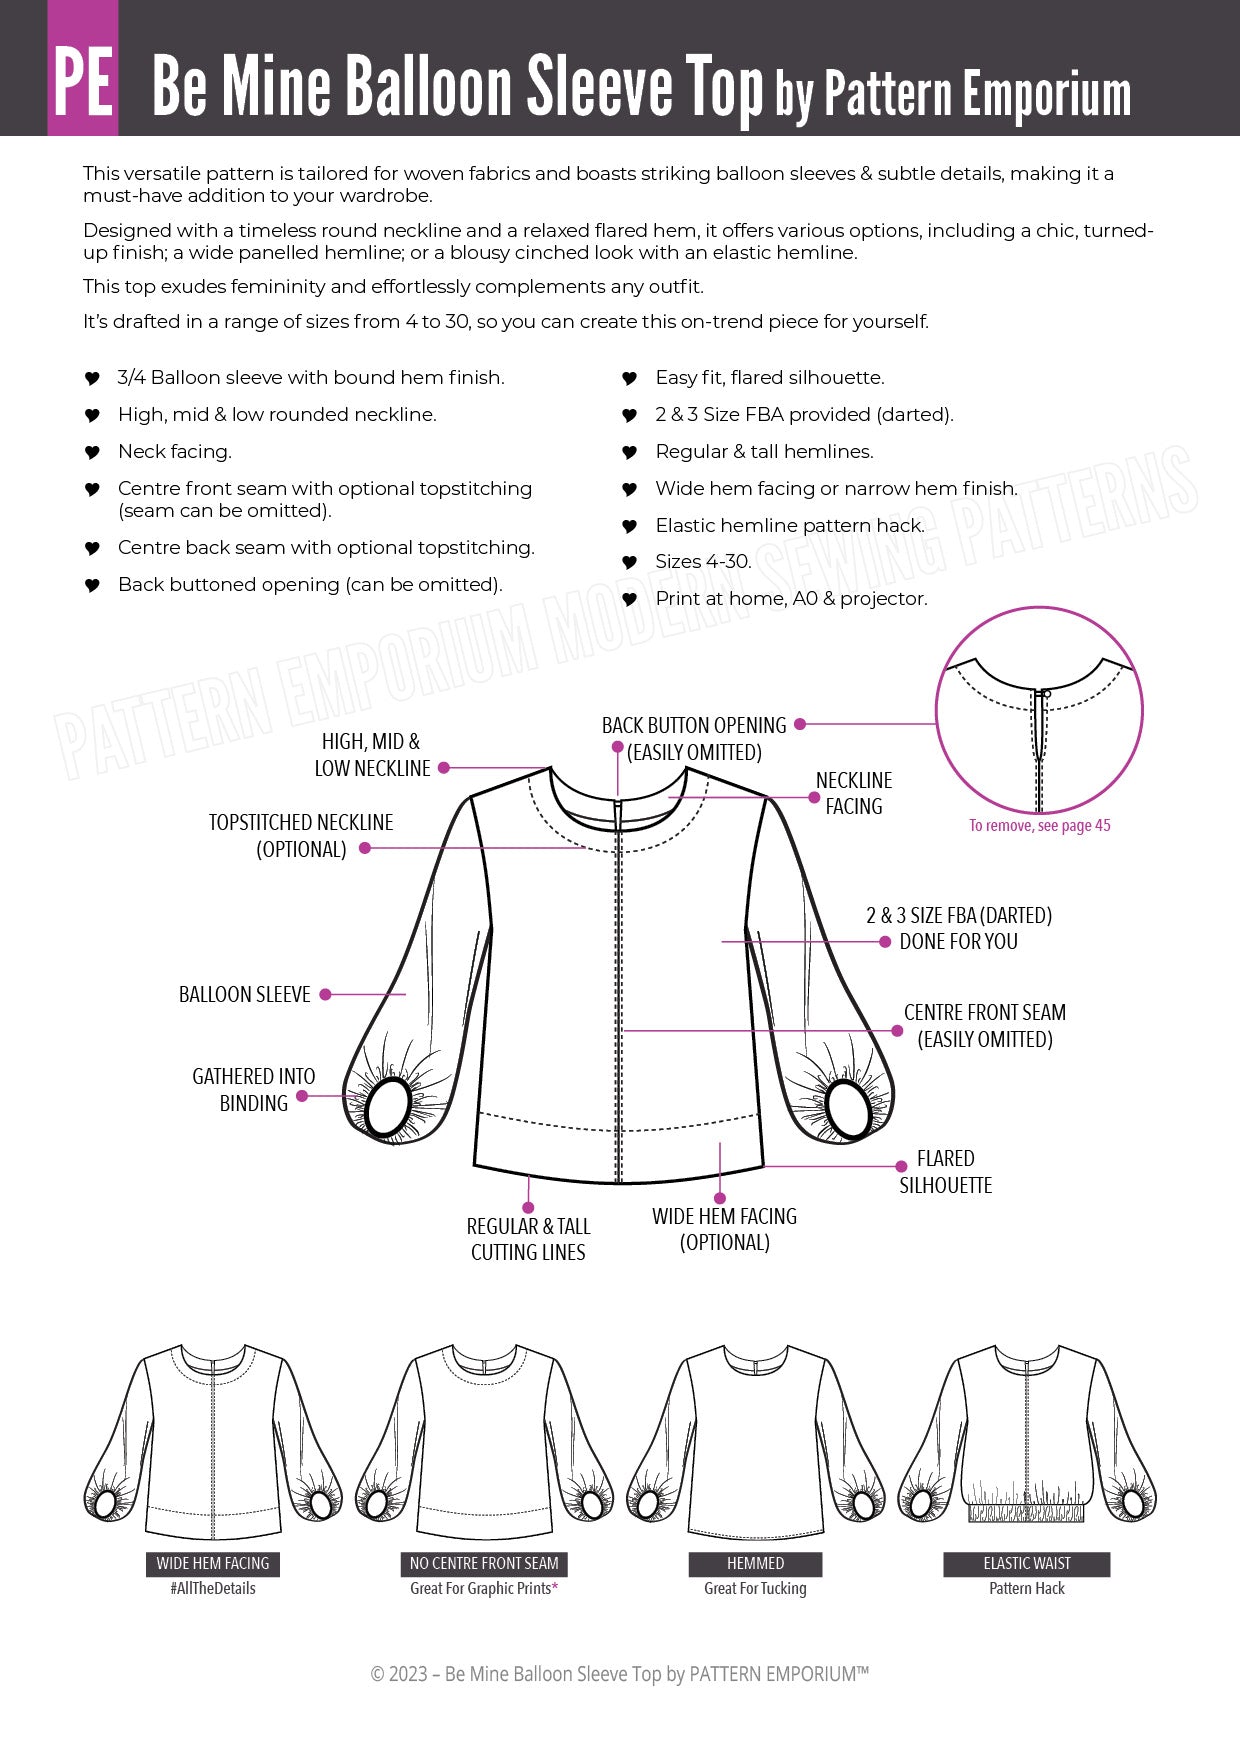
STEP 1: CHOOSING A SHORTS STYLE

As with the LMFP, there are numerous options (we love options), and even more depending on your skill level, your fabrics & trims and your imagination. All you need to do is pick a style & follow the instructions in the booklet, making the changes indicated below.

  1. Sporty Shorts- these are very short shorts
  1. Play Shorts- great short length for playing on hot day
  1. Bermuda Shorts- these sit mid thigh
  1. Knee Shorts - this style sits just above the knee
  1. Beachcombers - a longer style sitting well below the knee


STEP 2: CUTTING OUT YOUR SHORTS

Once you've printed out your pattern, you’ll see a dotted line across the knee for each size. Follow the tables below (GREEN is centimetres. PINK is inches) to cut the length you require, taking note whether you need to cut up or down from this line. Hem allowance has been taken into account in this table.


A few notes about the pockets:

  1. You may need to shorten pocket C & D for sizes 7 -10.
  2. Tab Pocket (A) & the Bubble Pocket (B) won’t work as is on the Sporty Shorts or the Play Shorts. They are too long. If you choose to use them, you’ll need to make some adjustments.

___________

STEP 3: SEWING


FOR SHORTS WITH POCKETS  (POCKETS C & D):

  1. Follow the procedure exactly as outlined from pages 28-35.
  2. If you don’t own an overlocker, at Step 20 turn the edge over 1cm (3/8") then again 2.25cm (7/8"). Otherwise, just follow the instructions as given.
  3. NOTE: if you’re making the Shortie Shorts, hem should only be 2.25cm (7/8") in total.
  4. At Step 30 (page 33) don’t leave a gap.
  5. Skip steps 31-33 (inserting elastic).
  6. Waistband - either follow instructions as Step 34 (page 33) for drawstring & elastic waistband or from Step 35-50 for just elastic.

___________


FOR SHORTS THAT ARE POCKET-FREE & SIDE SEAMS-FREE 
(AWESOME BEGINNERS OPTION):

  1. Follow procedure exactly as outlined from pages 31-35, starting at Step 20.
  2. If you don’t own an overlocker, at Step 20 turn the edge over 1cm (3/8") then again 2.25cm (7/8"). Otherwise, just follow the instructions as given.
  3. NOTE: if you’re making the Shortie Shorts, hem should only be 2.25cm (7/8") in total.
  4. At Step 30 (page 33) don’t leave a gap.
  5. Skip steps 31-33 (inserting elastic).
  6. Waistband - either follow instructions as Step 34 (page 33) for drawstring & elastic waistband or from Step 35-50 for just elastic.

___________


FOR SHORTS WITH TAB POCKETS A (ADVANCED BEGINNERS OPTION):

Note: you won’t be able to use this pocket for the 2 shorter styles.

  1. Follow the procedure exactly as outlined from pages 12-14, completing Steps 1-15. Then skip forward to page 31 and proceed starting with Step 18.
  2. If you don’t own an overlocker, at Step 20 turn edge over 1cm (3/8") then again 2.25cm (7/8"). Otherwise, just follow the instructions as given.
  3. NOTE: if you’re making the Shortie Shorts, hem should only be 2.25cm (7/8") in total.
  4. At Step 30 (page 33) don’t leave a gap.
  5. Skip steps 31-33 (inserting elastic).
  6. Waistband - either follow instructions as Step 34 (page 33) for drawstring & elastic waistband or from Step 35-50 for just elastic.

___________

FOR SHORTS WITH BUBBLE POCKETS B (INTERMEDIATE OPTION):

Note: you won’t be able to use this pocket for the 2 shorter styles.

  1. Follow the procedure exactly as outlined from pages 15-16, completing Steps 16-31. Then skip forward to page 31 and proceed starting with Step 18.
  1. If you don’t own an overlocker, at Step 20 turn the edge over 1cm (3/8") then again 2.25cm (7/8"). Otherwise, just follow the instructions as given.
  1. NOTE: if you’re making the Shortie Shorts, hem should only be 2.25cm (7/8") in total.
  1. At Step 30 (page 33) don’t leave a gap.
  1. Skip steps 31-33 (inserting elastic).
  1. Waistband - either follow instructions as Step 34 (page 33) for drawstring & elastic waistband or from Step 35-50 for just elastic.

___________

And that's it. Easy isn't it. 

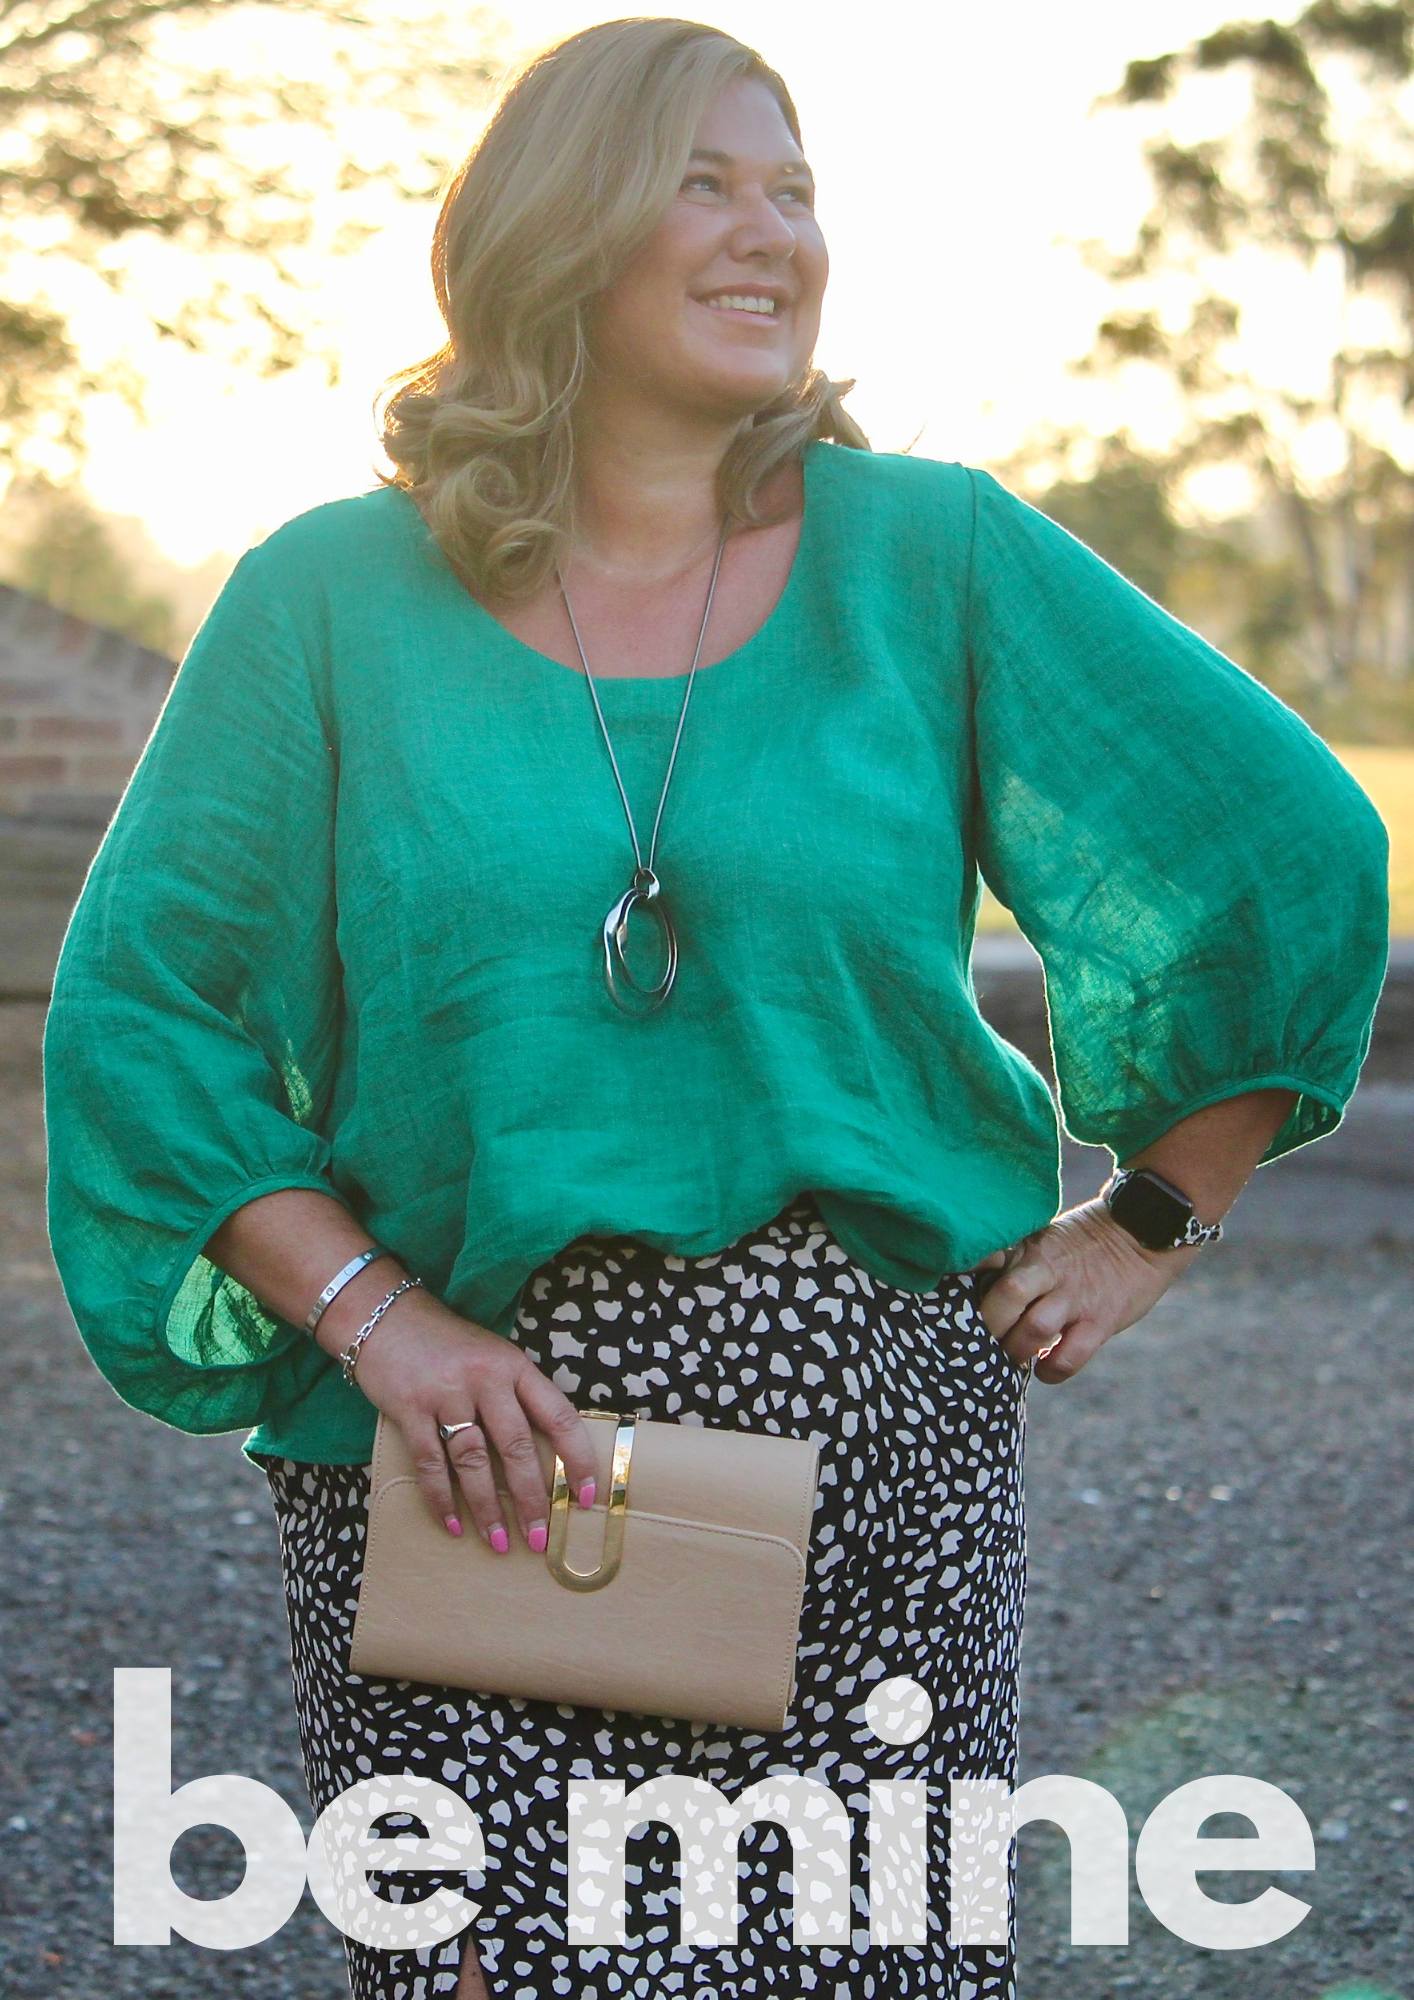
Here's a few people have made so far.