


Making Binding


This tutorial outlines how to make your own custom bias binding for your next project.
The bias is basically diagonally across the fabric at a 45 degree angle. It gives your fabric a little bit of stretch & allows you to work around curves easily. Have a look. Grab any square piece of fabric, even a face washer (wash cloth). Hold it diagonally and pull. See, it stretches a bit.
Tools:
• Iron • Ironing Board • Ruler (set square is handy) • Scissors
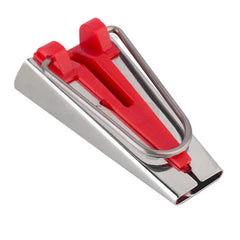
• Grab yourself one of these. It’s called a ‘Bias Tape Maker’. The best, in my opinion, is from Clover. For this project I use the #18 (the red one).
NOTE: Usually your fabric is not cut straight along the raw edge, so make sure you line your ruler up with the selvage to get a perfect right angle. If you don’t have a ruler, use something else that’s cut perfectly right angled (like an A4 sheet of paper) as a guide.
Okay, so here we go.
1. Lay your fabric out flat on your workspace.
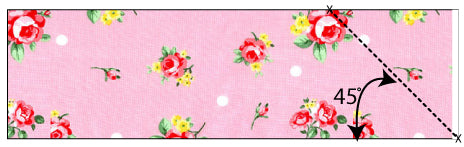
2. At right angle to the selvage, rule across approximately 30cm (12”).
3. Now go down 30cm (12”) from this line, & rule across again 30cm (12”) at right angles to the selvage.

4. Measure vertically A 20cm (8”) & horizontally the same B 20cm (8”). Draw a line joining these two points diagonally across your fabric. This gives you your 45 degree angle.
5. Draw another one 4cm (1 1/2”) to the left as below. Draw another one 4cm (1 1/2”) to the right of that one as below.
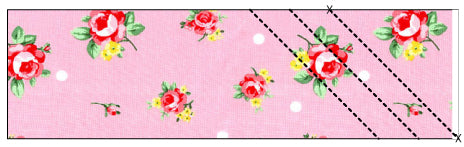
6. Cut along these lines as neatly as possible. This is called cutting on the ‘bias’ and is simply a 45 degree angle.

7. Lay your bias strip out on your ironing board, wrong side up.
8. Turn your iron on, I use a cotton setting but be VERY careful of the steam coming out of your iron. It will burn just like hot water does if you don’t keep your fingers away from it.
My little tip... BLOW! Seriously, just blow gently at the end of the iron where the steam comes out and it’ll blow the steam away and you won’t burn your fingers.
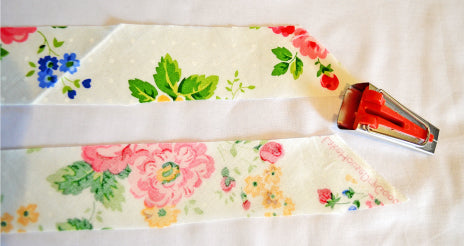
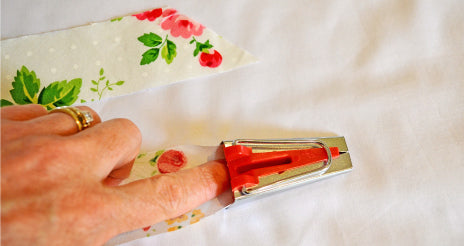
9. Push the end of your bias strip through the Tape Maker from the wide end to the narrow end.
Another little tip: it’s easier to feed through if it’s cut on an angle.
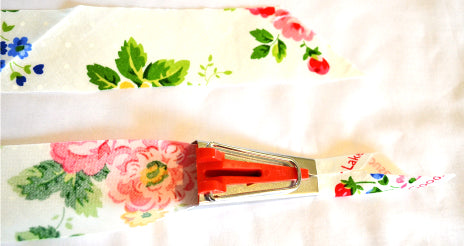
It should have folded the sides of your fabric over as below.
10. Now, place the iron at the tip of the Tape Maker and slowly pull the Tape Maker to the left, following with your iron right to the end of your strip.
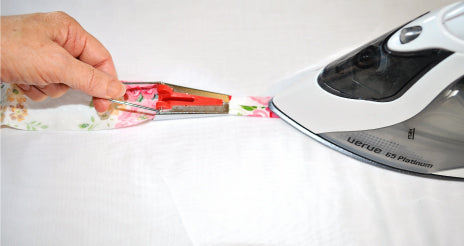
REMEMBER: blow gently and be careful of your fingers & the steam.
11. Lay your strip wrong side up so that the folded edges are visible.
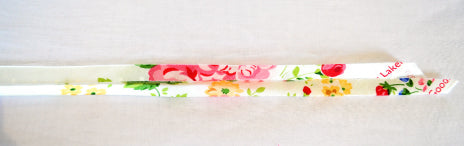
12. Fold the strip in half again longways so the bottom edge meets the top edge.

Iron as you go.

And you're finished :)
And now, click on the link (here) if you wish to learn how to sew your new custom bias binding onto your garment.


