When it comes to sewing, sometimes the magic lies in mixing and matching patterns to create something entirely unique. Whether it’s a fresh take on a classic design or a clever recreation of a look you’ve fallen in love with, pattern mashing is the ultimate creative playground.
In this blog, we’re diving into some stunning woven fabric mash-ups from our talented community of sewists. From statement sleeves to holiday-ready maxis, these designs will have you itching to start your next project. And if you’re a fan of stretch fabrics, stay tuned—next month, we’ll explore some fabulous knits!
1. Amanda’s Take the Chance + Sweet Talker Mash-Up
In our recent email & blog about sewing your Christmas outfit, Amanda's beautiful dress was one of our inspirations. Below you'll see how easy it is to make this mash yourself.

Amanda’s mash is a match made in sewing heaven. By combining the Take the Chance Shirt Dress with the Sweet Talker Bubble Sleeve Top, she’s created a dress that’s equal parts classic and dramatic. Here’s how she did it:
-
The Mash-Up:
- Amanda used the bodice, collar, and tiers from the Take the Chance Shirt Dress.
- She traced the armhole from the Sweet Talker Bubble Sleeve Top onto both the front and back bodice pieces of the Take the Chance dress. [Pro tip: Before tracing the back armhole, join the back bodice & yoke together, taking into account the seam allowances —it makes tracing much easier!]
- She then cut the bubble sleeve and sleeve facings from the Sweet Talker pattern.

-
The Steps:
- Sew the bodice and collar of the Take the Chance Shirt Dress, following the tutorial.
- When it indicates to start the sleeves, switch to the Sweet Talker tutorial and follow the bubble sleeve instructions.
- Once complete, attach the bubble sleeves to the bodice.
- Return to the Take the Chance tutorial to finish the tiers and complete your dress.

-
Amanda’s Extras:
Amanda went all out with some gorgeous details, including:- Covered buttons.
- A covered belt.
- Contrast trim on the collar and centre front.
Amanda also added a contrast trim around the collar & centre front. To find out more about how she did this, feel free to ask in our Facebook community.
2. Sherree’s All-In Shirt Dress + Sweet Talker Bubble Sleeve Mash-Up
Sherree took the All-In Shirt Dress to new heights by adding the dramatic bubble sleeve from the Sweet Talker Bubble Sleeve Top. The result? A mash-up that’s both stylish and versatile—perfect for any occasion.

-
The Mash-Up:
- Sherree started with the All-In Shirt Dress and traced the Sweet Talker armhole onto both the front and back bodice pieces. For the back, she joined the yoke and bodice together, remembering to account for seam allowances.
- She cut the bubble sleeve and sleeve facing in her preferred length (she chose the short sleeve).

-
The Steps:
- Adjust the armhole as outlined above.
- Sew the All-In Shirt Dress as usual, following the tutorial.
- Switch to the Sweet Talker tutorial to sew and attach the sleeves.
This simple mash-up is a great way to add a statement sleeve to an otherwise classic design.
3. Mel's Low Key Cami + Meet You There Dress Mash-Up
Sometimes, the best ideas come from a vision that’s been stuck in your head for ages—and this dress is the perfect example! Combining the Low Key Cami with the Meet You There Dress*, this mash-up is fun, breezy, and super easy to sew.

-
The Mash-Up:
- Start with the Low Key Cami as the base.
- Lengthen the front and back pattern pieces by 20cm (8") evenly along the hemline, following the existing side seams.
- Then add an extra 1.5cm (9/16") length at centre back & blend it into the existing hemline curve. This adds a bit of extra length for the booty (because we all love good coverage!).
- Add gentle waist shaping for a slightly closer fit.
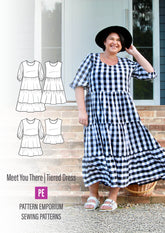
- For the ruffle along the hem, either use Tier 2 from the Meet You There Dress*, or cut a simple rectangle for the hem ruffle approximately 1.5–2 times the circumference of the front and back hem.
-
The Steps:
- Extend and shape the Low Key Cami as described above, cutting your adjusted front and back pieces.
- Sew the Low Key Cami as per the instructions, stopping before hemming.
- Cut your ruffle rectangle, gather it, and attach it to the hem of the cami.
- Finish as usual for a lightweight, breezy dress.
-
Why You'll Love It:
This mash-up is perfect for hot, humid weather—light, airy, and full of movement. And the best part? It’s so customisable. If you’re not as tall, you can adjust the length of the cami to suit your proportions. Plus, the gathered hem adds a touch of whimsy, making it ideal for summer adventures.
Get ready to whip up multiples—you’ll want one in every fabric!
4. Mel & Katy’s Summer Breeze + Calypso Kaftan Mash-Up
For a breezy summer-ready look, Melanie & Katy combined the Summer Breeze Dress with the Calypso Kaftan. This fabulous combo is perfect for warm weather and holiday vibes!
This is the simplest mash ever!

-
The Mash-Up:
- Skirt & Drawstring: Use the Summer Breeze pattern as is for the skirt and drawstring waist.
- Bodice: Create a new bodice pattern by folding away the centre front seam of the Summer Breeze bodice pattern. Choose your preferred neckline from the Calypso Kaftan—Melanie (above) used the ‘Wild and Sexy neckline’ for an off-the-shoulder vibe, while Katy (below) went for the high ‘Shine On’ neckline for added sun protection.

-
The Steps:
-
Cut & Sew the Skirt:
- Follow the Summer Breeze tutorial to cut the skirt pieces and prepare the drawstring waist.
- Assemble and sew the skirt following the Summer Breeze instructions, including the side seams and drawstring buttonholes (page 16-17).
-
Prepare & Sew the Bodice:
- Fold away the centre front seam on the Summer Breeze bodice pattern.
- Draw in your chosen neckline using the Calypso Kaftan pattern as a guide.
- Cut the bodice pieces and neckline binding to suit the neckline you selected.
- Follow the Calypso Kaftan instructions to sew the neckline.
- Follow the Summer Breeze instructions to finish the armholes.
-
Assemble the Dress:
- Attach the finished bodice to the sewn skirt, following the Summer Breeze tutorial for the waistline construction from page 18.
-

With its maxi dress length, side splits, drawstring waist, and floaty cotton fabric like a light voile, this dress is summer perfection.
4. Mel’s Summer Breeze + Make It Happen Mash-Up

For her second mash-up, Melanie paired the Summer Breeze Dress with the Make It Happen Top to create a sleek and modern maxi dress. The Make It Happen Top is a statement piece itself. Mashes them together gives it a whole new casual vibe.
-
The Mash-Up:
- Melanie swapped the Summer Breeze bodice for the Make It Happen Top, measuring it to match the length of the original Summer Breeze bodice.
- She adjusted the hemline width of the new top section to align perfectly with the skirt.
-
The Steps:
-
-
Cut & Sew the Skirt:
- Follow the Summer Breeze tutorial to cut the skirt pieces and prepare the drawstring waist.
- Assemble and sew the skirt following the Summer Breeze instructions, including the side seams and drawstring buttonholes (page 16-17).
-
Cut & Sew the Bodice:
- Use the Make It Happen Top pattern to create the bodice, ensuring it matches the length of the original Summer Breeze bodice.
- Adjust the side seams of the bodice so that the hem width matches the waist of the skirt.
- Sew the bodice, including finishing the neckline & armholes, following the Make It Happen tutorial.
-
Assemble the Dress:
- Attach the finished bodice to the sewn skirt, following the Summer Breeze tutorial for the waistline construction from page 18.
-

This mash-up is a fantastic option for anyone looking for a more fitted, streamlined silhouette.
Your Turn: Create Your Own Woven Mash-Up
Whether you’re adding statement sleeves or switching out bodices, pattern mashing is all about making designs that feel uniquely you. Start with these woven fabric ideas and see where your creativity takes you. And don’t forget to share your makes—we’d love to see what you create!
Next month, we’ll explore some stretch fabric mash-ups. Spoiler alert: it’s going to be just as fun (and maybe even more comfy). Stay tuned!


